Today I am going to start by showing you a set of notelets I made using some leftover Sale-a-Bration Designer Series Paper (DSP), before moving on to something containing only current and new products (except one thing, I realised!). Try to keep in mind that by simply switching out the paper, ribbon, brads and stamps, you can easily create your own version of this first set of notelets. For those of you who are looking for things to do with your leftover SAB DSP, I hope this can inspire you!
I started with a design I was shown at a Quarterly training, demonstrated by the lovely Michelle Last. She showed that we can easily create a set of notelets with a 12" x 12" sheet of paper, by cutting it to 25cm x 25cm and scoring it at the 7cm and 8.5cm mark on all sides. Then cut the corner squares out along the inner score lines, and you have created the basic pouch and can use the corner pieces (after trimming them slightly) as the fronts of your notelet cards! Notelet cards are typically 3" x 3", or 7.5cm square when folded. To get four notelet bases out of one sheet of a4 cardstock, cut the notelets to 7.4cm x 14.8cm and score in the middle at 7.4cm and you can cut down on waste without drastically changing the size of the notelets!
The notelets fit nicely into the little pouch with their little envelopes. To hold my notelet pouch closed, I used the Postage Stamp punch (from the Spring Mini- may or may not make its way into the main catalogue in the fall) to punch out some Poppy Parade cardstock, and cut two diagonal slits where the corners of the postage stamp would go, so I could slide those corners in and hold the pouch shut.
I used the Scallop Trim Corner punch on the corners of the front flap, and layered some Poppy Parade behind it to add some colour. I made four different notelets to go inside, and I think they are very classy! The bases of the notelets are Naturals Ivory cardstock.
On this first one, I hand-stitched around the heart (punched out with the Full Heart punch), which I love! I wrapped the linen thread around the edges and secured the ends on the back with glue dots, and stamped the sentiment (from the Thank You Kindly set) with White Craft ink in the centre of the heart and set it with the heat tool. I used a brad to add just a little something else... The brad pictured is a product Stampin' Up! released in the US for the US Sale-a-Bration, which I purchased online from a US demonstrator. It came along with some pretty organza ribbon, which I have used on some of the notelets below. I don't normally buy things that I can't sell, but in this case I just couldn't resist!
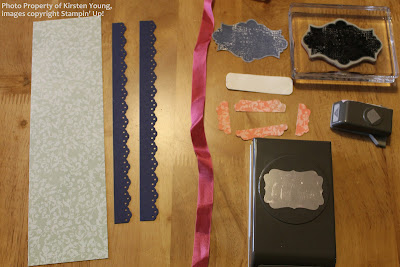
For this next notelet, I used the Sale-a-Bration stamp set Fresh Vintage and my Stamp-a-ma-jig to stamp (and sticky notes for a mask!) with Poppy Parade ink onto the Poppy Parade cardstock. I wrapped the ribbon around so it formed an elongated "x" with a line vertically through the centre. I stamped "A NOTE OF THANKS" from the Thank You Kindly set onto some Naturals Ivory cardstock, and punched out with the Decorative Label punch. To make this shape, punch just above the sentiment, attach to a sticky note, and put back in the punch to punch in the same fashion along the bottom of the sentiment. It does take some practice, but it gives a very unique shape that is just begging to be secured to the card with brads! Taking a break from the standard square, on this next notelet I made each square into a scalloped square, using the Scallop Edge Border punch. I'll have to make a whole tutorial to explain how to do this, as I can't seem to find the right words, but you can find a nice tutorial on Split Coast Stampers. I stamped "A NOTE OF THANKS" onto Naturals Ivory cardstock, cut it into a rectangle, and snipped the end by hand. I secured this onto the card with a large brad.
The last notelet of this set is very simple and sweet. I stamped "Thank You" onto the DSP, layered it over the Poppy Parade, and made a little bow out of the ribbon. To make this bow, wrap the ribbon around two fingers until you have created two complete loops, then take the ends and tie them around the centre of the loops. By "tie" I mean just a half of a square knot, like the first thing you do with your laces when you tie your shoes.
Over the centre of the bow, I attached the brad by wedging the bow in between the prongs of the brad, and inserting the brad through a hole I punched in the card front. I then opened the prongs to lay them flat against the back of the Poppy Parade, and that was it!
Last but not least, I created some coordinating envelopes to go with the notelets. These are just the mini square envelopes from the main catalogue, which I stamped in Soft Suede with a stamp from the Fresh Vintage set. I stamped another image from the same set (the postage stamp looking one), in Poppy Parade onto Ivory Naturals cardstock. I punched them out with the Postage Stamp punch from the Spring Mini catalogue and attached them onto the corners! Ta Daaaa!!!
Now that I have possibly bored you and/or frustrated you (hopefully not!) by my use of discontinued and/or unobtainable-until-further-notice products, I would like to share with you the second set of notelets I made, using only currently-available products (except for one punch, sorry!). The style of this next set is completely unlike the style of the first, as you will soon see. This is one reason Stampin' Up!'s products are so amazing; they are so versatile and you can make each card or project your way. Of course you can Copy and Share something someone else created, but one of my favourite things to do is make something using only the inpiration that pops into my head.
This is one of those instances where I tried to make something I've never seen before. I think the colours and the style really are a reflection of some part of me.
I remember when I was nine years old, I wanted to bring Valentine's day treats for all the kids in my class. It's an American thing (so I understand, I may be wrong) for all the children in the class to bring one Valentine for every class member, and trade them on the day. Sometimes they come with sweets, sometimes not. So a lot like swaps at our demonstrator events, then! Anyway, when I was nine, my mom and I spent a lot of time making little origami boxes for everyone using wallpaper samples which we had picked up for free from a store that was closing down. I think we made 24 boxes with lids, and I loved it!
So for this set of notelets, I wanted to make an origami box to hold them. Since cardstock is a bit thick, it helps if you score folding lines into it to help the process go nice and smoothly. This is where Simply Scored proves its worth, and the Diagonal Plate too! I'm not going to explain just yet the instructions on making the box, I'll save that for another tutorial. But I would love to show you how I decorated everything, and I will tell you that the base of the box was 25 cm square before it was folded.
This is the top of the box, which coordinates with both sets of notelets contained within:
Once the lid is removed, you can see that I've stamped the stars again onto the sides of the box with Melon Mambo ink:Inside the box are eight notelets. The first four have a Melon Mambo base, with Basic Black on the top. With the Basic Black squares, I have punched them into scalloped squares with the Scallop Edge Border punch. Onto this I have stamped the Stylish Star a la carte stamp with Versamark and embossed with Heat and Stick powder. This makes the image sticky, which is very useful when you want a solid glitter image. I applied the glitter after heating the first time, and heated it again after tapping off the excess glitter to permanently set the glitter into the image.
After embossing, I put a glue dot behind one of the corners of the scalloped square to hold the Baker's Twine as I wrapped it around the edges. I wrapped up, then around the corner, to the left, around the corner, then down, around the corner, and to the right, and stuck this end onto the same glue dot as the first end. I punched tiny holes with the 1/16" Handheld Circle punch, and attached brads by strattling them over the intersection of the strings. To add a little detail, I used Simply Scored to add a raised frame just inside the border created by the twine.
The second group of notelets has a Whisper White base, two strips of Basic Black cut out with the Dotted Scallop Ribbon Border punch, a large scallop circle (from the Spring Mini... sorry again!) in Melon Mambo and a 1-3/4" circle of Whisper White. I have left the base and the black strips plain, but to the edges of the Melon Mambo scalloped circle I have brushed my 2-Way Glue Pen around the edges, and dipped them in glitter. To the Whisper White circles I have stamped the Sylish Star in Melon Mambo ink, and brushed the edges of the circles onto the Melon Mambo ink pad.
Finally, I have stamped the Stylish Star onto the upper right hand corner of the envelopes in Melon Mambo ink, which completes my little box set! These are the mini envelopes from the main catalogue again, just like the first set of notelets.
There we have it, two completely different sets of notelets, ready to be grabbed off the shelf to write a quick note to say "Thanks" or "Congratulations," etc. I really like the idea of leaving them blank so they can be used for anything at the drop of a hat, but you can never have too many Thank You notes! In fact, just having them around may encourage you to give thanks more! And that can't be anything but good!
Speaking of thanks, Thank You so much for stopping by to let me share with you, and please do share my blog with anybody and everybody. It would be much appreciated! And if you haven't already, please click the link at the top of the page and "like" my facebook page if you can. If you have already done so, Thank You!!!
Until next time, friends, Happy Crafting! And I do hope you get a chance to enjoy some of this sunshine!
Thanks again,


